
How to Install Board and Batten
5 min readFind out how to put in a Board and Batten wall. We’re listed here to aid you do it on your own with specialist-looking success!
Arrive see how to build the vivid yellow Swedish Mora Clock and the Dutch Barn Door / Little one Gate, much too!


Do it yourself Board and Batten Wall Tutorial
Products for Installing a Board and Batten Wall:
- Boards for Base Molding: We selected 1×8 MDF
- Boards for Crown Molding: We opted for a simple somewhat than ornate glimpse and selected 1×4 MDF. We ran a single on the wall and a single on the ceiling to make a wrapped-corner glimpse.
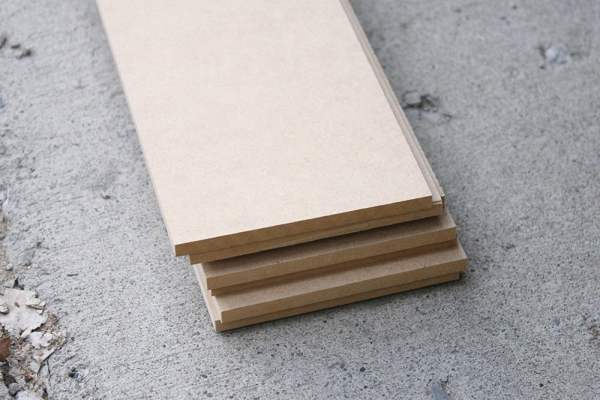
- Battens (vertical boards): In the previous we have used 1×4 or 1×2’s that are the identical thickness as the higher and lower molding, but this time I desired the battens to be small and insignificant to make a light texture. At our area Residence Depot they experienced some 3 3/4″ x 1/4″ thick unpainted MDF strips identified as MDF Bender boards. They ended up in the lumber isle in the vicinity of the plywood and NOT with the moldings. They ended up a terrific rate and just extensive adequate to be ripped (reduce length-smart) in half to make the delicate glimpse I was going for.
- Desk Observed
- Nail gun and nails
- Caulk and Gap Patching Compound
- Paint
Be certain to look at out this tutorial for excellent board and batten spacing!
Board and Batten Move 1: Set up Base Molding
Evaluate, reduce, and put in the foundation molding.

The stair used to be wrapped with carpet, but we desired to stay away from that and clean up up the glimpse. We created out the stair a little bit and then wrapped it with the MDF. We obtained lucky and the MDF was the actual identical peak as the stair!

Board and Batten Move 2: Set up Crown Molding
Evaluate and reduce your crown molding parts. Utilizing the ceiling piece as a spacer, push the wall piece up to the ceiling piece (you will need to have a helper to do this, which is why we didn’t get any photos) and nail in place.

Upcoming put in your ceiling piece.

*Suggestion* We didn’t have joists to nail the crown molding to on this part of the ceiling. You can use anchor bolts for a Great deal of extra perform or you can do what we did: to hold the board in place, set in 2 nails at a forty five degree angle to the suitable and then straight away flip your nailer the other route and incorporate two additional in a forty five degree angle to the left. The “v” produced by the nails acts like an anchor. I wouldn’t do this with major beams, but for a lightweight molding, it is effective properly.

Board and Batten Move 3: Rip the Battens (if wanted)
Our battens wanted ripped in half, don’t forget.


And since we reduce ours, we took the time to sand down the top rated two edges of the board to assure that the edges ended up clean up and that all imperfections ended up sanded down.
*Suggestion* Lower edges of MDF generally need to have sanding. Because MDF is so smooth, the imperfections will be quite clear once you paint. Never skip sanding!
Board and Batten Move 4: Set up the Battens
Be certain to make your spacing excellent. Observe this board and batten spacing tutorial and you will stop up with the specialist-looking success you want!
1. Mark out the spacing.

2. Evaluate the peak you will need to have for that batten in that place. Lower your batten. (Do this for every single batten, as ceilings and flooring are not as amount as you feel!)
3. Location the bottom of the batten at your spacing mark and nail once in the vicinity of the bottom of the board to keep it in place in accordance to your spacing mark.
4. Location a amount on the facet of the batten board and adjust the board until it is beautifully vertical.

five. Nail once in the vicinity of the top rated then secure it to the wall with a several additional nails in the middle.

six. Repeat the system with every single batten.
Board and Batten Move five: Patch the nail holes and caulk all the seams
Patch the nail holes and caulk concerning the boards and the wall to fill the gaps.

Board and Batten Move six: Paint
We selected Sherwin Williams Higher Reflective White, and, oh, the variation the paint will make! Make certain to inspect your paint career from the left and suitable to assure each individual inch of the battens is included in paint. It’s simple to pass up the slim facet upcoming to the wall!

For portray the molding upcoming to the floor, I used heavyweight scrapbook paper as a “drop cloth” of types. It moved together simply and slid less than the hole of the foundation molding beautifully with no taping demanded!
And we’re performed! See how the battens just kind of melt into the wall? They give a slight texture and sample but they are not the focal place — specifically the subtlety we desired!

If you’d like to see additional of our projects at the Canyon Property, look through as a result of them listed here and stick to us on Facebook and Instagram for additional inspiration and tutorials.
Much more Do it yourself wall therapy tutorials:

This put up originally printed 05.04.2013 // Up to date 03.06.2020


.jpg "5 Compelling Reasons Why You Need Kitchen Remodel")