
How to Knit Mittens Tutorial
3 min read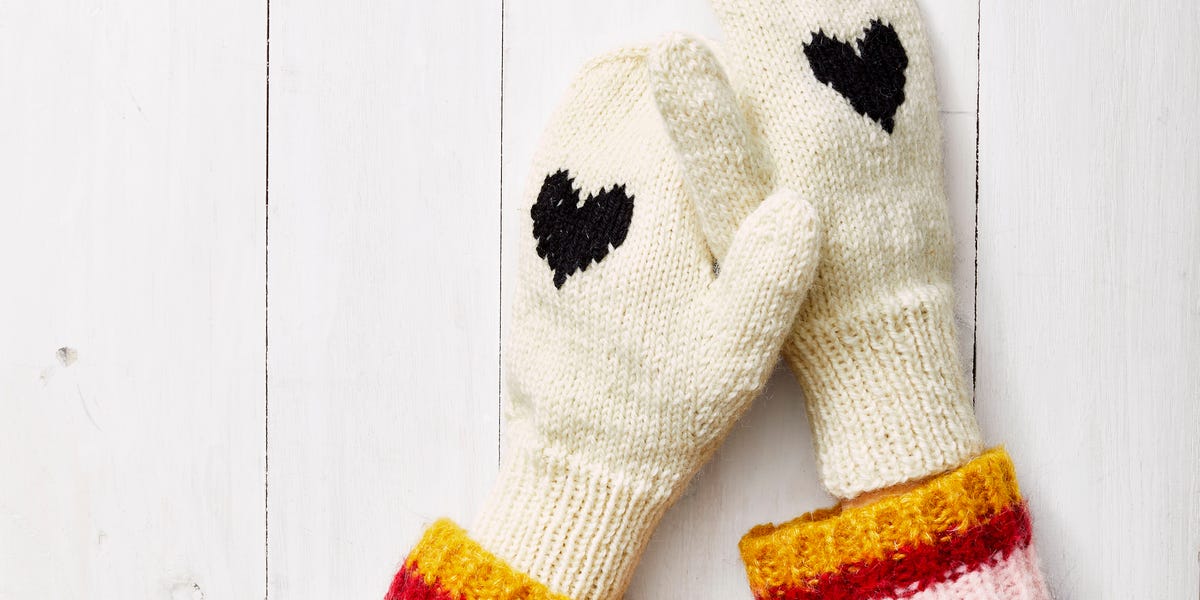
Adapted from a vintage Good Housekeeping pattern, this tutorial for knit mittens is made modern with simple colors and easy-to-read instructions. Challenge yourself by knitting a pair featuring an embroidered heart for your loved one this Valentine’s Day, or any romantic occasion!
What You’ll Need:
You can also use comparable yarns such as Purl Soho Linen Quill Worsted , Knit Picks Wool of the Andes or Lion Brand Wool Ease. If you want to invest in a set of interchangeable circular needles, we like the sets from Lykke. Try the 3.5″ Set for this project.

How to Knit Mittens, Step by Step
GLOSSARY: K: Knit // P: Purl // PM: Place Marker // K1B: Knit 1 Below (increase) // SSK: Slip Slip Knit (decrease)
STEP 1: CUFF
Using the long tail method, cast on 46 (52) using US 3 circular needles. PM, join in round. Work K1 P1 rib until wrist measures 3” using the magic loop method. Change to US 4 circular needles. Knit (stockinette) for 1/2″.
K1B (knit 1 below), K rest of row (47/53). *K 2 rows. K1B, K1, K1B, K rest of row*
Repeat in ** until there are 61 (71) stitches. K 2 more rows.
Small: K 17, transfer 44 to waste yarn.
Large: K 19, transfer 52 to waste yarn.
STEP 2: THUMB
Knit in the round, using the magic loop method, for 1.5” (1.75”)
Note: You can try on the mitten at this point and see if you need to make the thumb longer. Thumb should come to 1/2″ below the tip of your thumb.
Start decrease for tip of thumb.
Small: K2TG, K4, K2TG, K4, K2TG, K3 (14)
K row
K2TG, K3, K2TG, K3, K2TG, K2 (11)
K row
Large: K2TG, K4, K2TG, K4, K2TG, K5 (16)
K row
K2TG, K3, K2TG, K3, K2TG, K4 (13)
K row
K2TG, K2, K2TG, K2, K2TG, K3 (10)
K row
Cut from working yarn, leaving at least a 4″ tail. Thread end onto tapestry needle and thread through stitches remaining on the circular needle. Remove the knitting needle and pull the tail to cinch top of thumb closed. Pull tail through to wrong side, and secure the loose end by tying a knot or weaving in the end.
STEP 3. HAND
Pick up stitches for main body of mitten. Knit (stockinette) for 3” (3.25”)
Note: At this point, try on your mitten. The top (decrease portion) measures about 1.25”. The mitten should just cover your pinky finger at this point.
Start decrease for hand.
Small: K1, SSK, K16, K2TG, K1, PM, K1, SSK, K16, K2TG, K1 (40)
K row
*K1, SSK, K to 3 before marker, K2TG, K1, slip marker, K1, SSK, K to 3 before marker, K2TG, K1 (36)
K row*
Repeat in ** until 12 stitches remain. Cut yarn, thread onto tapestry needle, weave through all stitches on needle and cinch.
Large: K1, SSK, K20, K2TG, K1, PM, K1, SSK, K20, K2TG, K1 (48)
K row
*K1, SSK, K to 3 before marker, K2TG, K1, slip marker, K1, SSK, K to 3 before marker, K2TG, K1 (44)
K row*
Repeat in ** until 12 stitches remain. Cut yarn, thread onto tapestry needle, weave through all stitches on needle and cinch.
Weave in or knot all loose ends on wrong side.
Repeat pattern for second mitten.
STEP 4. HEART
Using duplicate stitch, follow the pattern below to embroider the heart onto the middle of your mitten.
Tip: Fold your mitten in half the long way to find the middle. Mark with a straight pin and begin embroidering the heart in the middle, working one side of the heart and then the other.
Download and print the full mitten pattern to complete the project and keep your hands toasty warm this winter.
This content is created and maintained by a third party, and imported onto this page to help users provide their email addresses. You may be able to find more information about this and similar content at piano.io


.jpg "5 Compelling Reasons Why You Need Kitchen Remodel")